Development installation of XGAP
XGAP builds on the MOLGENIS toolbox for XgapCustomization. There are three steps involved in the development installation of XGAP:
- Download XGAP from the repository. Currently we use version 1.2
- Download MOLGENIS from a repository. Currently we use version 3.3
- Check buildpath and running of the generator
We will now go into detail for each of these steps.
Download XGAP source code from subversion
For this tutorial it is assumed you already installed Java, MySQL and Tomcat as described in XgapInstall or MolgenisInstall.
1) Get an IDE such as Eclipse (see: http://www.eclipse.org) and install by extracting the archive.
For this tutorial, we assume you use Eclipse and start out with a clean installation and a new workspace.
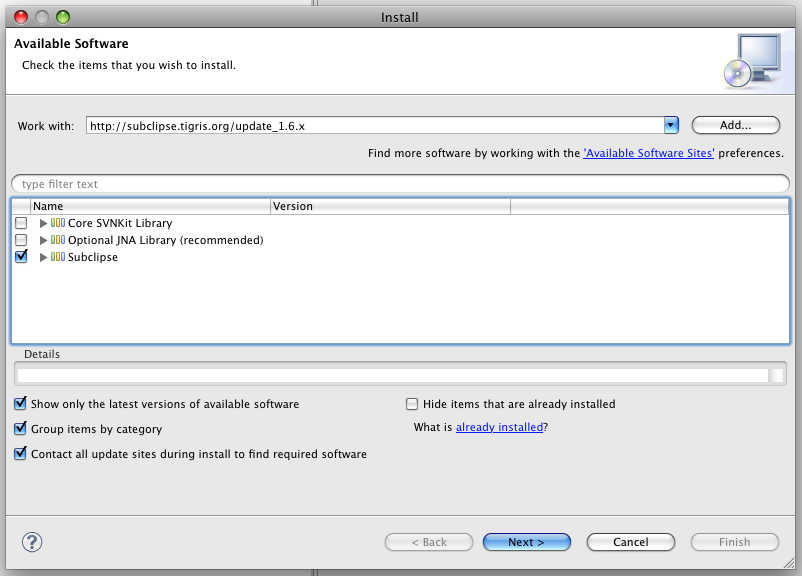
2) Install Subclipse (see: http://subclipse.tigris.org):
- Go to Help -> Install New Software...
- Paste the URL http://subclipse.tigris.org/update_1.6.x or equivalent, tick 'Subclipse', click Next

- Click Next again, 'I agree' (if you do), Finish.
- Restart Eclipse 'Yes'.
3) Switch to SVN perpective:
- Go to Window -> Open Perspective -> Other...
- Select 'SVN Repository Exploring'
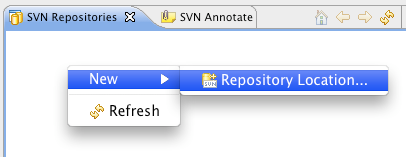
4) Add the XGAP repository:
- Click right-mouse button in the SVN window

- Enter this URL: http://www.xgap.org/svn and click Finish.
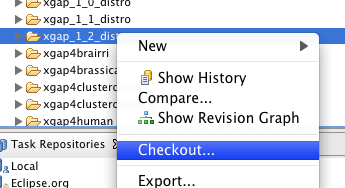
5) Download the XGAP distro:
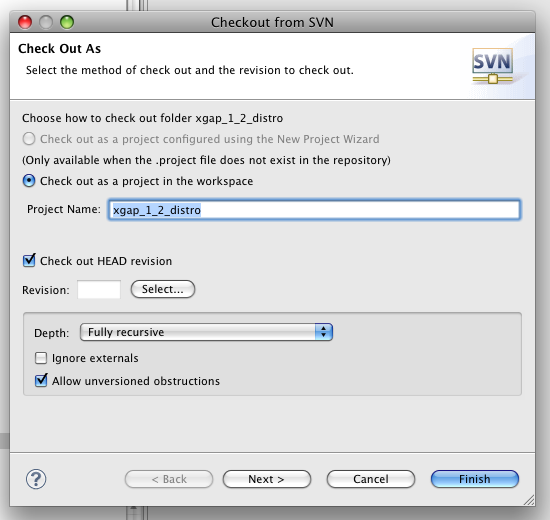
- Expand the repository. Right-click on 'xgap_1_2_distro' and select Checkout.

- Leave the settings and click Finish.

Download MOLGENIS
1) Stay in SVN perspective or repeat Step 3 of 'Download XGAP'.
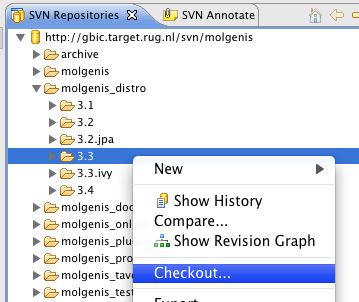
2) Add the XGAP repository:
- Click right-mouse button in the SVN window
- Enter this URL: http://gbic.target.rug.nl/svn/molgenis and click Finish.
3) Download the MOLGENIS toolbox:
- Expand the repository. Expand the folder 'molgenis', right-click on '3.3' and select Checkout.

Running XGAP
The distro doesn't contain generated code. So we will first generate this code. Then we will update the database and run XGAP. See http://www.molgenis.org/wiki/MolgenisGeneratorBasics for general details on this procedure.
1) Switch back to Java EE perspective. (either use the toolbar or Window -> Open Perspective)
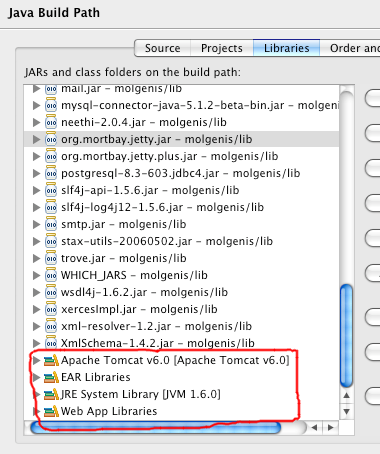
2) Check the xgap_1_2_distro build path. The XGAP distro project has a number of pre-set dependancies. The 'Java EE module dependancies' should include the 'molgenis' project as well as the libraries contained within.

3) The other libraries needed are as such:

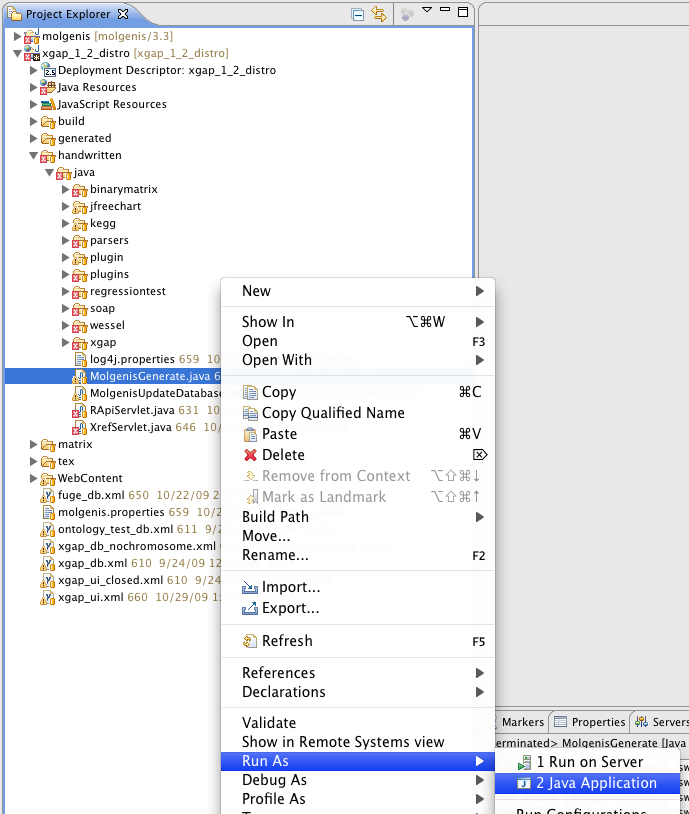
4) When this is set up correctly, you can run the MolgenisGenerate.java to generate the code for the XGAP system. You can find the generator in handwritten/java:

5) Refresh eclipse to pick up the generated code. To this end rightclick on the xgap_1_2_distro and click 'Refresh'. The code is now compiled.
With all the code compiled we can now update the database and run XGAP. We assume you have created a xgap_1_2_distro database as described in XgapInstall and have given MOLGENIS permission to access it.
6) To update the database structure, run MolgenisUpdateDatabase.java. This updates the database structure
7) Run XGAP by right-clicking the xgap_1_2_distro project and choosing 'Run -> Run on server'. Notice: on the first run this will in a dialog asking you to define a new server. Choose Tomcat of your version and choose [next] to point it to the right directory.
Attachments (9)
- svn2.png (18.3 KB) - added by 17 years ago.
- svn3.png (23.0 KB) - added by 17 years ago.
- svn4.png (52.7 KB) - added by 17 years ago.
- svn5.png (30.4 KB) - added by 17 years ago.
- svn6.png (26.7 KB) - added by 17 years ago.
- svn8.png (138.6 KB) - added by 17 years ago.
- svn7.png (63.5 KB) - added by 17 years ago.
-
svn1.png (61.7 KB) - added by 16 years ago.
svn1.png
- screenshot1.png (55.4 KB) - added by 16 years ago.
Download all attachments as: .zip